Setting up the receipt printer
- For
- Administrator
- Where
- Installed register, Web register
- Permission
- Sell at the register
- Checked on
The register prints the receipt through two Windows print queues, Reçu + tiroir and Reçu seul, which drive the same printer. This guide installs the printer in Windows, creates the two queues, then checks that a receipt comes out of the register.
Before you start
- The printer is an Epson TM-T88V, switched on, with a roll of 80 mm paper (Supported hardware).
- It is connected to the register computer (USB port or network port) and its Epson driver for Windows is installed.
- You have the rights to install printers in Windows.
The two queues must be named exactly Reçu + tiroir and Reçu seul. The register picks the queue for each print: if one is missing or has another name, the receipt does not come out.
The screens below are Windows screens, not Braavu POS screens: they are not illustrated here, and their labels vary a little with the version of Windows and of the driver.
Create the “Reçu + tiroir” queue
If the printer is already installed in Windows with the Epson driver, rename it. Otherwise, install it first with the Epson driver, then come back here.
- Open Control Panel > Devices and Printers.
- Right-click the Epson printer, then click Rename.
- Type
Reçu + tiroir.
Create the “Reçu seul” queue
The second queue drives the same printer, on the same port.
- In Devices and Printers, click Add a printer.
- Choose Add a local printer or network printer with manual settings.
- Choose Use an existing port, then the port of the first queue (for example
USB001). This is what makes both queues drive the same printer. - Choose the Epson TM-T88V driver, already installed.
- Type
Reçu seulas the printer name. - Finish the wizard.
Set the paper of both queues
The paper size comes from the driver, not from the register. It must be the same in both queues.
- Right-click a queue, then click Printing preferences.
- In the paper tab, choose an 80 mm roll size.
- Do the same on the other queue.
The drawer setting is made queue by queue: see Connecting the cash drawer.
Check with a test page
To check each queue:
- Right-click the queue, then click Printer properties.
- Click Print Test Page.
It must come out on both queues.
Check at the register
To check with a real sale, at the installed register:
Make a sale and pay it in cash (Making a sale).
Read the message under Receipt no.
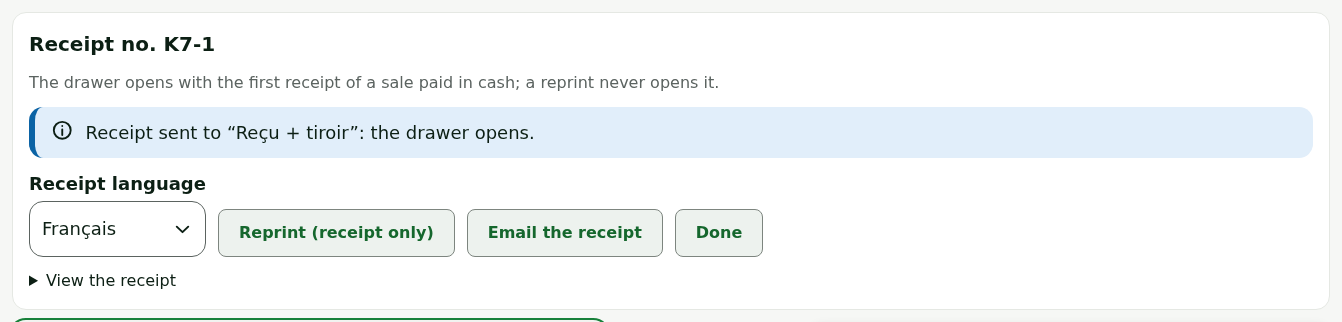
The receipt comes out of the printer. Only the first receipt of a sale with cash goes to Reçu + tiroir and opens the drawer. A sale paid by card only, and every reprint, go to Reçu seul.
To check the printer from the web register:
Open Sell > Status.
Click Test the printer.
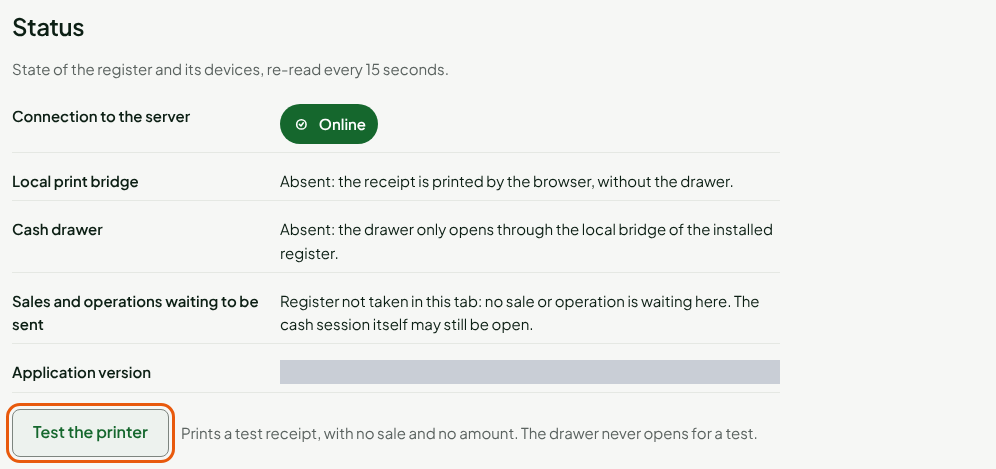
The test prints a receipt with no sale and no amount, through the browser: it never opens the drawer. The Local print bridge line says whether the web register can print through the computer's installed register; without it, the receipt prints through the browser, without the drawer.
Troubleshooting
The receipt does not come out
See Troubleshooting receipt printers. A paid sale is never paid again: reprint its receipt.