Creating roles and permissions
- For
- Administrator
- Where
- Back office
- Permission
- Manage roles
- Checked on
A role groups permissions: what a person can do in Braavu POS. A person receives roles, never a single permission. Create a role when neither Caissier nor Gérant fits a position on your team.
Before you start
- Your role needs the permission Manage roles.
- You can only grant the permissions you hold: the other boxes are greyed out. Removing a permission is always allowed.
- The roles Administrateur, Caissier and Gérant exist in advance, and keep their French names on this screen. The Administrateur role cannot be edited (see Understanding the administrator's rights).
A role is never deleted. A role that is no longer used is archived: it becomes inactive, grants no permission any more and is no longer offered on an employee's record.
Creating a role
To create a role that sells and gives limited discounts:
Open Team > Roles.
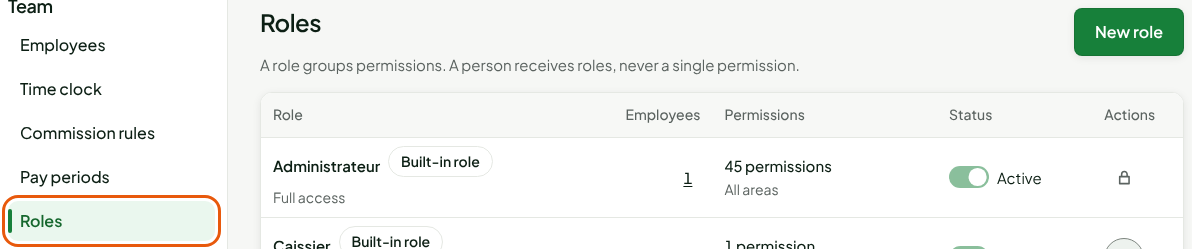
Click New role.
In Name, type the role's name, for example
Display clerk. The software derives a key from it, which does not change afterwards.
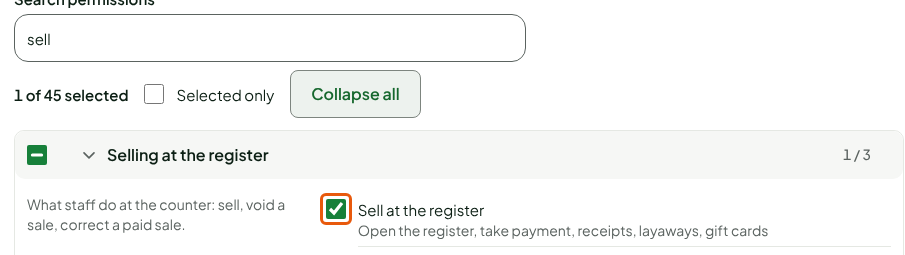
Under Permissions, tick what the role allows. To find a permission, type it in Search permissions (a title, a category or a code): for example "sell", then tick Sell at the register.
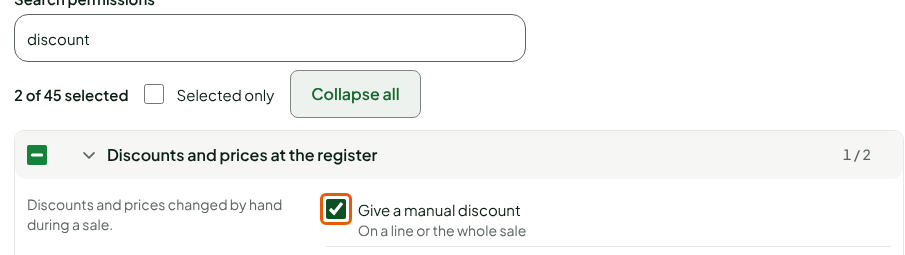
Search "discount", then tick Give a manual discount.
Some permissions depend on another: the screen writes "Tick … first" followed by the parent permission. To tick or untick a whole group at once, use the group's box.
Setting the role's maximum discount
Under Discounts, there are two limits per role. They apply to a discount given by hand at the register, compared with the regular price:
- Maximum discount per line, in %: on one item;
- Maximum discount on the sale, in %: on the whole sale.
Type a whole number from 0 to 100 in each field, for example
20and10.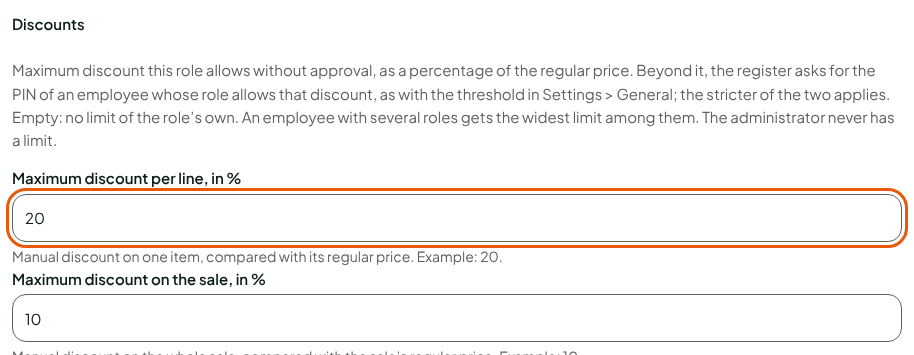
Click Create the role.
The screen shows "Role “Display clerk” created." The role appears in the list, active, with its number of permissions and no employee.

Above its limit, the register asks for the PIN of an employee whose role allows that discount. An empty field means "no limit of its own for the role". A person with several roles gets the widest limit among them; the administrator never has one.
Limiting a person to their own sales
For a role to see only the person's own sales (sales history and sales reports), leave All sales at assigned stores unticked. This permission depends on View reports.
Archiving a role
Open Team > Roles, then click the pencil at the right of the role.
Tick Archive this role: it no longer grants any permission.

Click Save.
The role stays in the list, with the status Inactive.

A built-in role cannot be archived. A role you hold, you cannot change yourself.
Troubleshooting
A permission is greyed out
You do not hold it, so you cannot grant it. Ask an administrator to create the role.
"An existing role, perhaps archived, already has the key derived from this name."
Click Create the role again: another key is chosen. You can also change the name.